Setting up Marketing 360® Payments is a simple process that you can complete in as little as 15 minutes. The setup process consists of four main steps:
Activate Marketing 360® Payments: Turn on the Payments app in your Marketing 360® account.
Fill out an application: Complete the application to get approved for our payment processing tools.
Sync your bank account: Connect the bank account where you'll receive payouts.
Run a test transaction: Make sure transactions are successfully going to your bank account.
Note: You can only sync one bank account to your Payments App, and it must be a checking account that accepts both debits and credits.
Step 1: Activate Marketing 360® Payments
Payments is available to anyone with an active Marketing 360® account.
Log in to your account at app.marketing360.com with your account owner permissions.
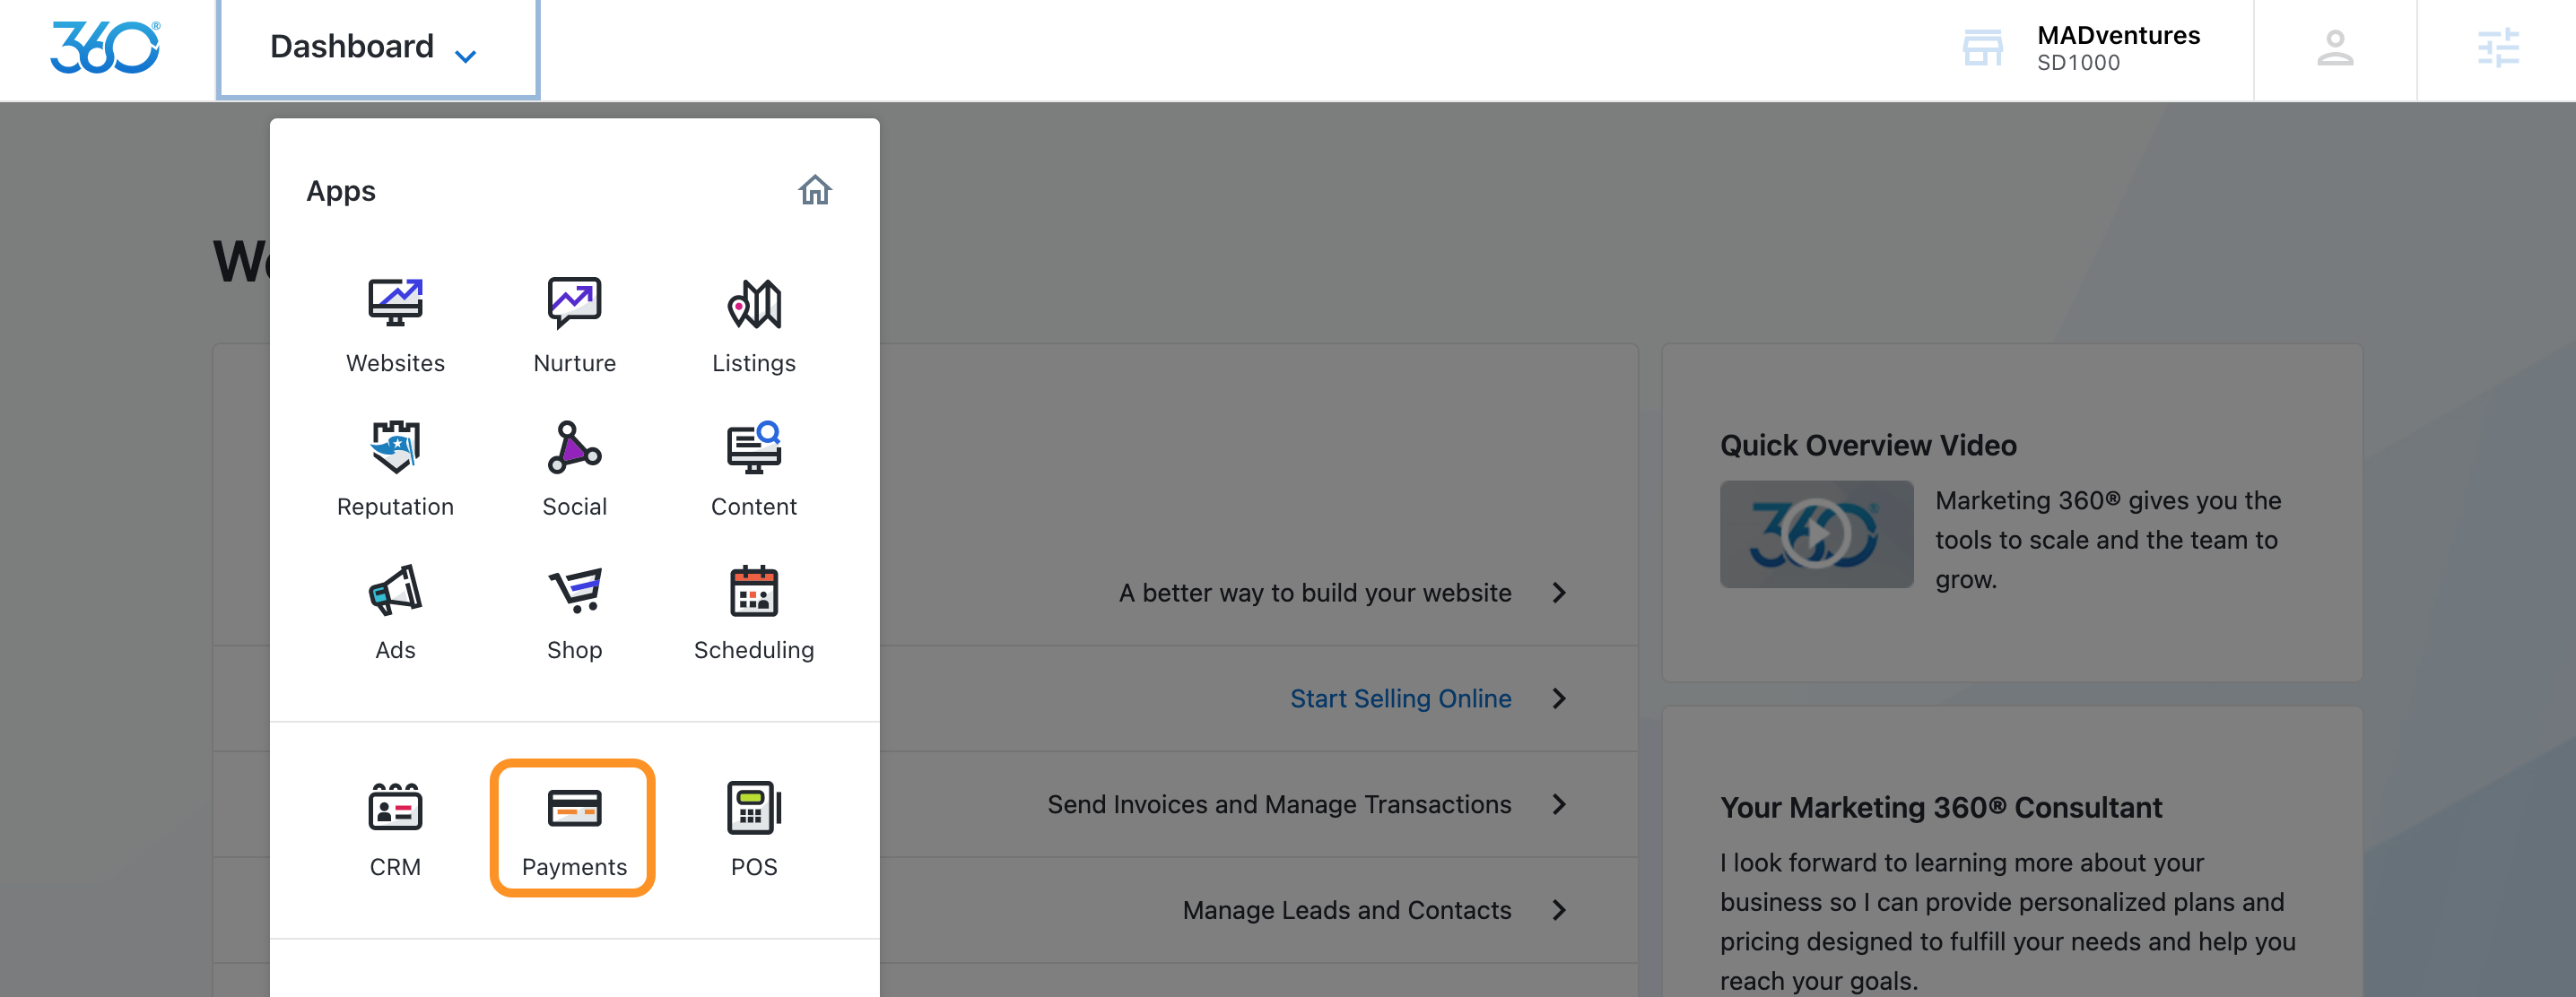
Navigate to the Payments app from the overview screen or the navigation drop-down menu.
Check the box to agree to the Payments Terms of Service and unlock Payments.
Step 2: Fill out the Application
Next, you'll need to complete an application to confirm your business details.
Start by adding your legal business name and Employer Identification Number (EIN). Make sure the name matches the one on your EIN.
Next, enter your business's registered address, phone number, industry, and website link. If you don't have a website, you can provide an app store link, a social media profile, or a product description.
Then, enter your personal information. This must be an executive, senior manager, or someone with significant responsibility in the business for security reasons.
If applicable, enter the details for any other business owners who own 35% or more of your company. If there are no other owners, click Continue with No Owners.
Finally, the system will ask you to verify the information you entered. If everything looks good, you'll be prompted to click the Done button.
Step 3: Set Up Your Bank Account
You must link your bank account to the Payments tool to receive your payouts.
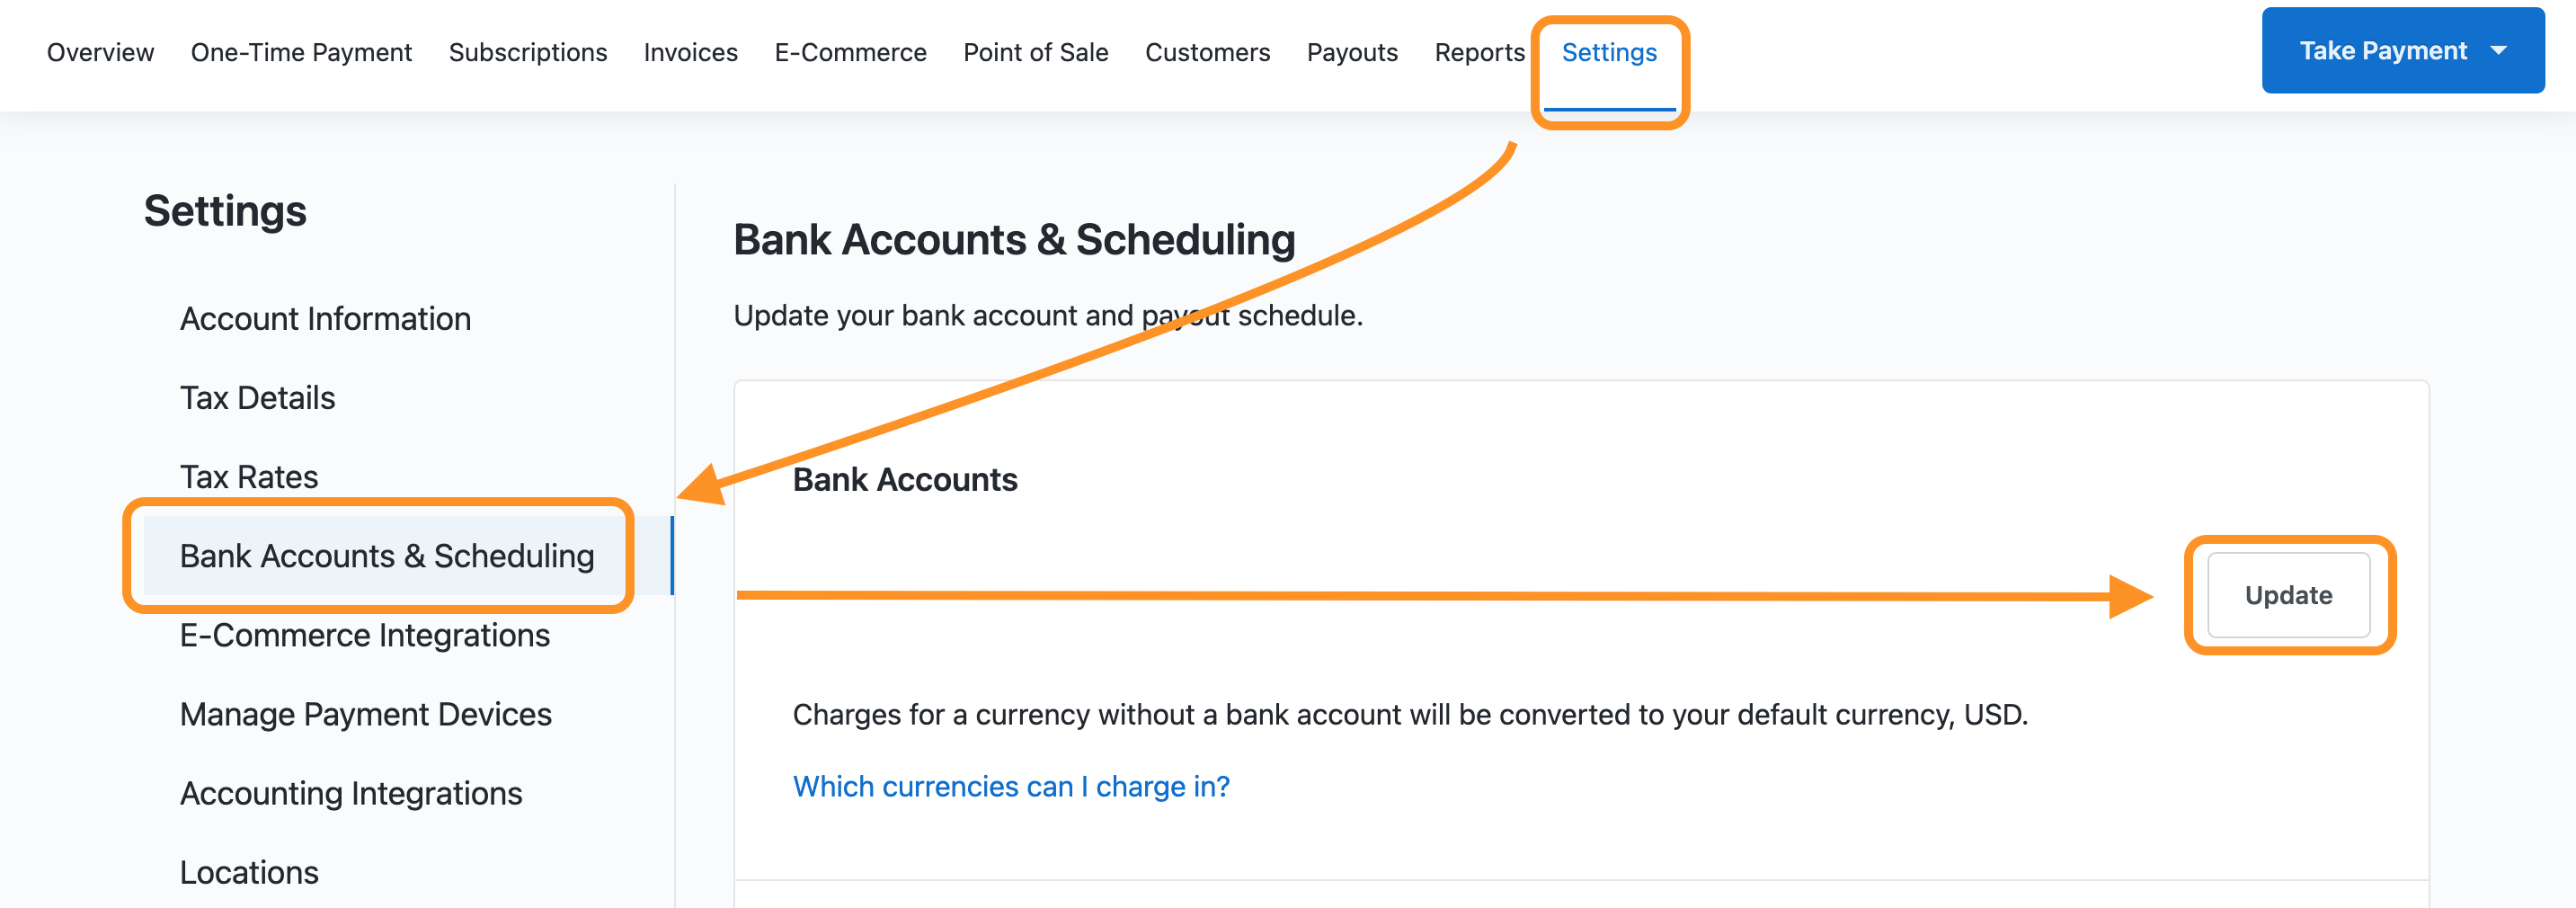
Inside the Payments dashboard, select the Settings tab.
On the left-hand sidebar, select Bank Accounts & Scheduling.
Click the Update button under the "Bank Account" settings.
You have two options to link your bank account:
Securely Link Bank Account: Click this button to use Plaid, a secure service that lets you select your bank from a list and log in to your online banking account.
Manually Link Your Account: If your bank is not listed, click the link that says Prefer to manually link your account? at the bottom. You will be asked to enter your Account Holder Name, Routing Number, and Account Number.
Click Update Bank Account when you're finished.
Step 4: Run a Test Transaction
It's a good idea to run a test transaction to ensure you're receiving payments in your bank account. You can do this from either the Marketing 360® Mobile App or the Payments Dashboard.
Using the Mobile App
Open the Marketing 360® Mobile App on your device.
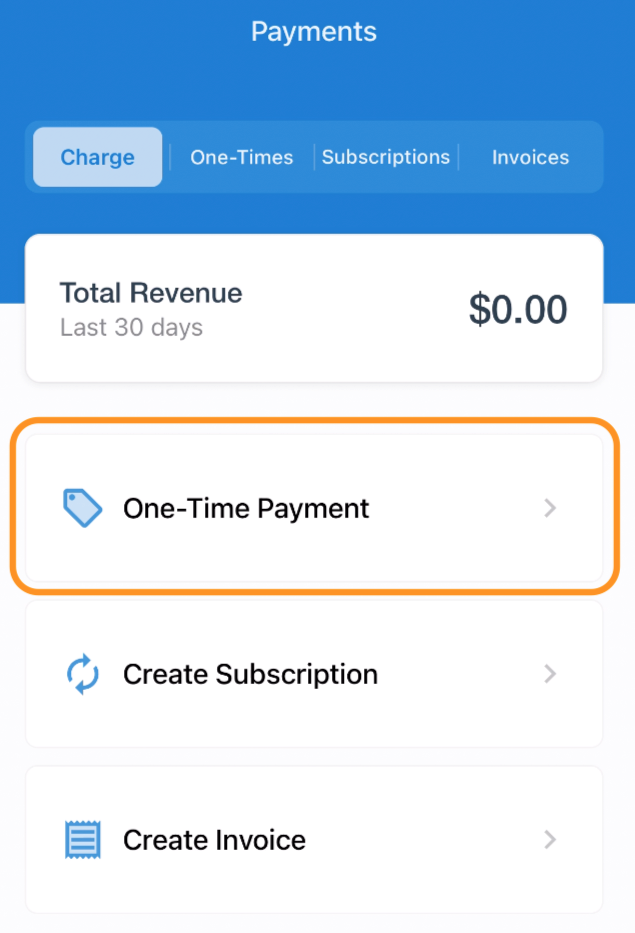
Navigate to the Payments page and click One-Time Payment.
Enter a small amount (like $1) and click the + button.
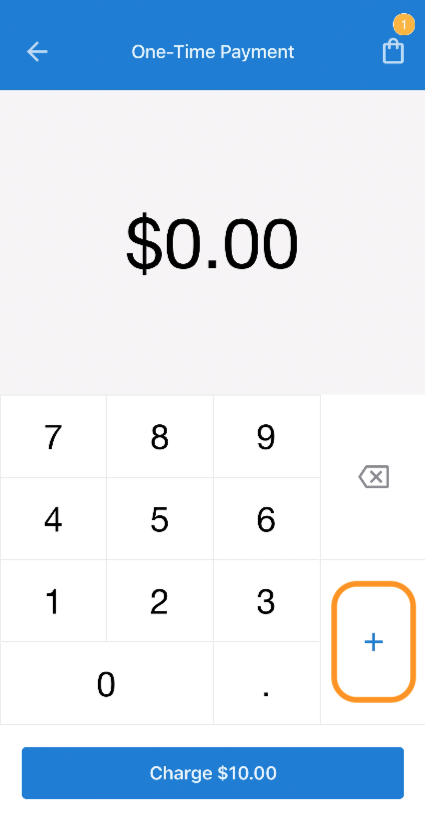
Click the blue Charge button.
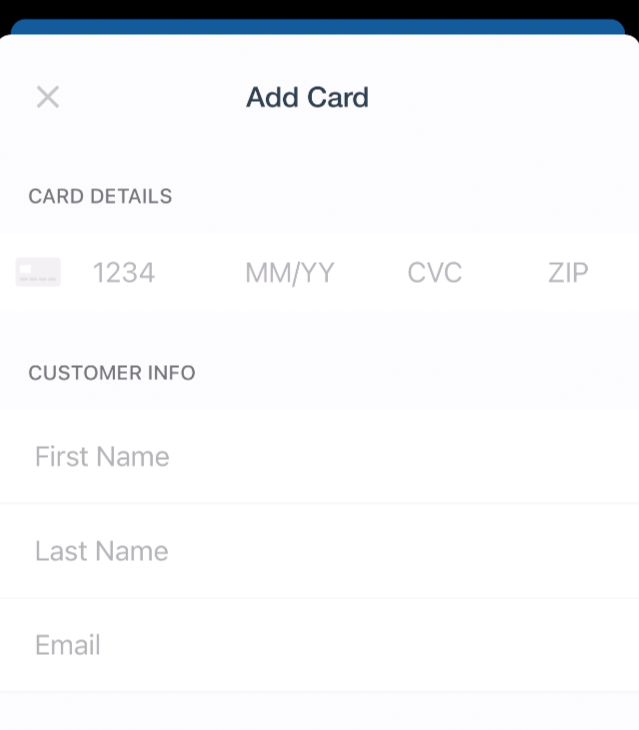
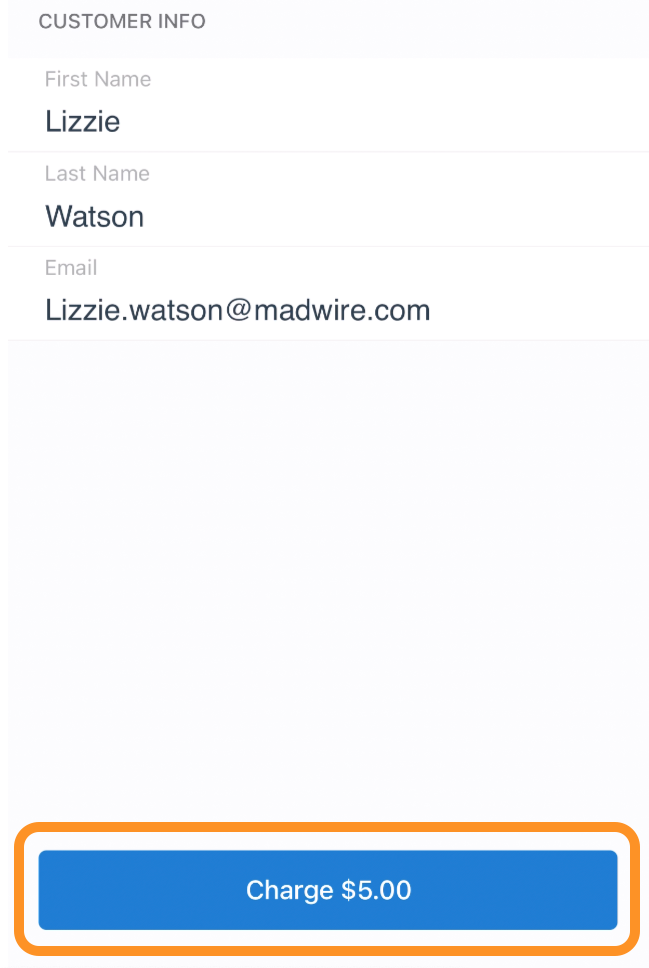
Click Add Card and manually enter your payment information. Enter your email to receive a receipt.
Click the blue Charge button to complete the payment.
To confirm, go to Payments > One-Times in the navigation. You should see your transaction here.

Using the Payments Dashboard
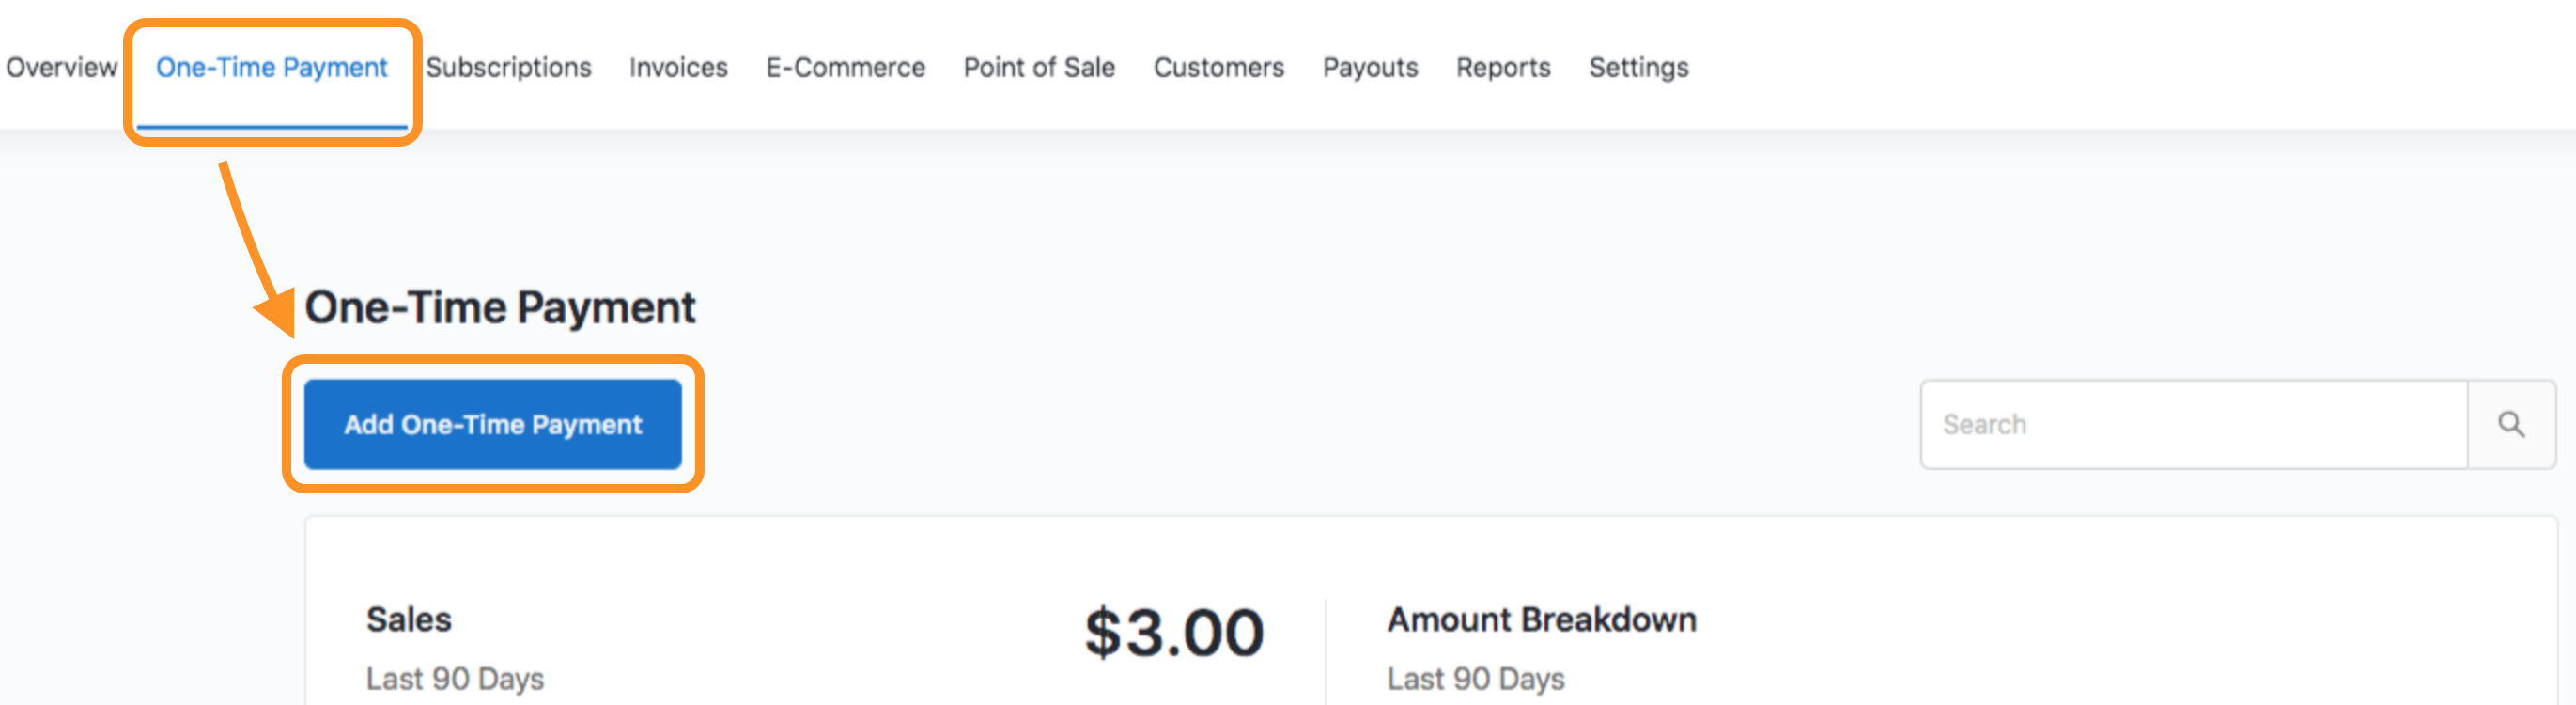
Within the Payments app, click on the One-Time Payment tab.
Click the Add One-Time Payment button.
Fill out the pop-up box with the amount and card details. It's best to enter your own information for a test transaction.

Click the blue Checkout button. A message will pop up confirming your payment was successful. If the transaction is declined, you will be notified.